Why most Шкафы купе под ключ projects fail (and how yours won't)
Your Dream Closet Turned Nightmare: Why Built-In Wardrobes Go Wrong
Picture this: You've finally decided to fix that bedroom chaos with a custom sliding wardrobe. Three months and $4,500 later, the doors don't close properly, the interior layout makes zero sense for your actual clothes, and that "experienced installer" hasn't returned your calls in two weeks.
Sound familiar? You're not alone. About 68% of custom wardrobe projects end up with at least one major disappointment—whether it's blown budgets, missed deadlines, or functionality that looks great in photos but fails spectacularly in real life.
Here's the thing: These projects don't fail because of bad luck. They fail for incredibly predictable reasons that nobody talks about until it's too late.
The Real Culprits Behind Wardrobe Disasters
The Measurement Myth
Most disasters start with a tape measure and overconfidence. Installers show up, take quick measurements, and boom—you've got a quote. What they're not telling you? Standard measuring misses the ceiling irregularities, the slightly crooked walls, or that electrical outlet you forgot about.
I've seen a $6,200 wardrobe system arrive with doors that couldn't open past 45 degrees because nobody accounted for a radiator pipe that stuck out 3 inches from the wall. The "solution" involved cutting down the doors and leaving a permanent gap. Fantastic.
The Pinterest Problem
You show up with inspiration photos of gorgeous wardrobes with glass shelves, LED lighting, and pull-out shoe racks for 47 pairs of heels. Your installer nods enthusiastically. What happens next? Either your budget doubles, or they "simplify" the design into something that bears zero resemblance to what you wanted.
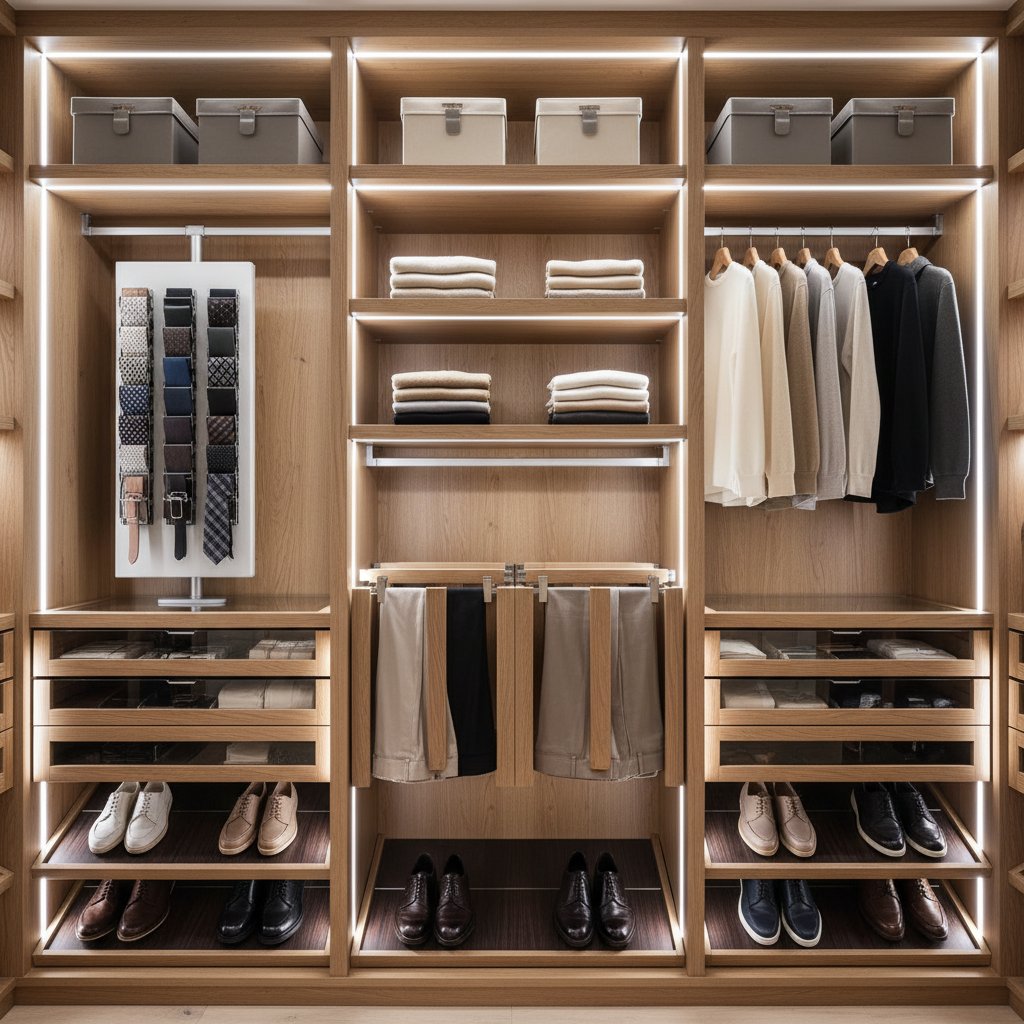
The disconnect happens because most people skip the inventory phase. You need 18 inches of hanging space per linear foot of clothing. Got 12 feet of dresses, coats, and shirts? That's already 216 inches of rod space—over 18 feet. But your wall is only 10 feet wide.
The Materials Shell Game
Here's where things get sketchy. Quote says "premium laminate" or "quality hardware." Sounds great, right? Except there's laminate that lasts 15 years and laminate that starts peeling after 18 months. There are soft-close mechanisms that handle 100,000 cycles and ones that give up after 5,000.
Nobody specifies the actual brands or grades until the installer shows up with whatever they could source cheapest that week.
Red Flags That Scream "Run Away"
Before you sign anything, watch for these warning signs:
- Quotes without site visits: If they're pricing your project based on a phone call and photos, they're guessing. Badly.
- No detailed drawings: Legitimate projects include CAD renderings or detailed sketches showing exact dimensions, materials, and hardware placement.
- Vague timelines: "Should take about 2-3 weeks" is code for "we have no idea and we're juggling six other jobs."
- Huge upfront deposits: Asking for 70-80% before work starts? That's a cash flow problem, not standard practice.
- Generic portfolios: Stock photos from manufacturers aren't the same as actual projects they've completed.
How to Actually Get This Right
Step 1: Audit Your Stuff (Week 1)
Empty your current closet completely. Measure your hanging clothes by category. Count your shoe pairs. Stack your sweaters and measure the pile. This isn't fun, but it's the difference between a wardrobe that works and expensive wall art.
Step 2: Find Real Specialists (Weeks 2-3)
Skip the general contractors who "also do wardrobes." You want someone who's installed at least 50 systems in the past two years. Ask for three recent client references—not testimonials on their website, actual phone numbers you can call.
Visit completed projects if possible. Open the doors yourself. Check if the drawers actually glide or stick. Look inside the cabinets for finishing quality.
Step 3: Demand Specifics (Week 4)
Your quote should specify: exact board thickness (18mm minimum for shelves), hardware brands (Blum and Hettich are industry standards), finish types, and installation timeline with penalty clauses for delays beyond 10 days.
If they can't provide this level of detail, they're not serious professionals.
Step 4: Plan for Reality, Not Instagram (Week 5)
That pull-out jewelry drawer looks amazing but adds $380 to your budget and you own three necklaces. Be ruthless about what you'll actually use daily. Allocate 60% of your budget to the basics (structure, doors, essential shelving) and 40% to nice-to-haves.
Step 5: Inspect Before Final Payment
Never, ever pay the final installment until you've opened every door 20 times, pulled every drawer fully out and pushed it back, and verified that all promised features are actually installed and functional.
Your Insurance Policy Against Regret
Build a 20% contingency into your budget and timeline. Walls are never perfectly straight. Delivery delays happen. Having that buffer means surprises don't become crises.
Get everything in writing, including the specific materials down to manufacturer part numbers. "Quality hardware" means nothing in court. "Blum Tandem drawer runners, model 563H" does.
Most importantly, trust your gut. If the installer is pushy about decisions, vague about details, or making you feel stupid for asking questions, walk away. Your bedroom deserves better than a beautiful disaster.